|
...Mould it and make it out of rubber
This How-to will tell you how to mould a simple piece and make the
finished item in rubber.
Firstly you must sculpt the item that you wish to
produce, for this example Oil Based Clay has been used. Oil Based Clay is a non-air
drying clay which is important so it remains pliable throughout the process.
The item has been built up by hand on a piece of plastic - the lid from a
plastic tub in this case.
Important: Oil Based Clay is reusable - you can use it
time and time again to make different sculpts once you've finished with the
moulding stage of the process.

A clay barrier has built up around the edge of the piece.
This step is not always required, but in this case it will make the job
easier and save a lot of mess.
Next you will need to mix up a hard casting plaster such
as Herculite-2 or Crystacal-R to make a negative impression from the clay
piece. This will involve pouring plaster over the item until it is covered
with a thick layer. As the plaster is very runny to start with it may be
necessary to spoon the excess back onto the top to make sure that it is
evenly coated - this is where the clay barrier around the outside of the
working area is important.
This may require several lots of plaster to be mixed up
in order to make a good thick plaster piece. You may also consider
reinforcing the plaster with a scrim fabric or Modroc plaster of Paris
bandages to add extra strength depending on the size of the piece:

Once it's all set up (allow at least 24 hours for it to
dry through), you can remove the clay barrier and remove the plaster from
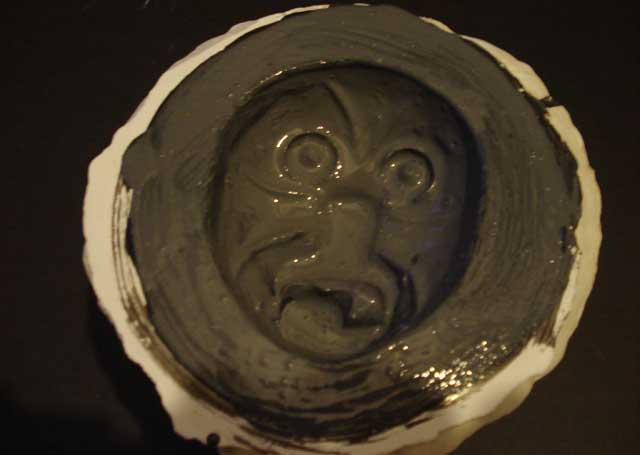
the plastic base. Now it's time to remove the clay which is why
it's important to use a non-air drying clay such as Oil Based Clay. Carefully
separate the clay from the plaster and make sure all of it comes out. This
should leave a negative impression in the plaster which is the same as the
original clay sculpt:
The best way to get the clay out is to dig the middle out
and then work around the edge pulling the clay away from the plaster. If
you're lucky it might all come out in one go, otherwise you'll have to go
and clean the rest of the clay out, nevertheless, it should separate from
the plaster quite easily:

The plaster piece is now your mould to make the latex
rubber piece from. Be very careful with the mould as it is likely that the
clay sculpt was destroyed as it was removed. The plaster mould is all that
is left of the clay sculpt which may have taken some time to make. You can
use the plaster mould time and time again to make latex rubber pieces from -
some people say up to 100 times depending on the type of plaster used.
In this example I have chosen to pigment the latex to
make it black, other pigment colours are available and you can also mix them
together. The total pigment added to liquid latex should be around 5% - it
will appear very light in colour to start with but as the latex dries the
colour will get much darker. Here's my latex mixed with 5% black pigment:

For large pieces you can brush thin coats of latex into
the mould and let it dry. You can also pour all the latex into the mould and
rotate it around to coat all the surfaces. For small pieces you can
completely fill the mould with latex, leave it for 30 mins - 1 hour and then
pour out the excess. In all cases when applying latex to plaster you'll find
that thick coats are easy to build up because the plaster soaks up the water
content from the latex.
Make sure you go right over the edge of the main part of
the mould - the excess can be trimmed off later and this will help make sure
that there is a thick coat right to the edge of the finished piece. In this
example a combination of brushing and rotating the mould was used to build
up the latex coats. If you have a really big piece to make you may also
consider adding layers of cloth after about every ten coats of latex. This
will stop the item from shrinking so much as the latex dries and give it a
heavier feel, although it will also stop it being as stretchy as it would be
if it were made only of latex:

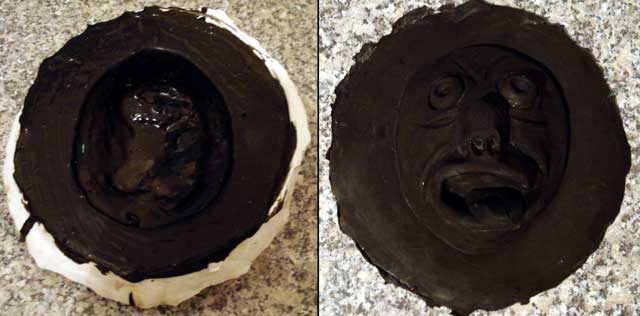
Once around 5 thick coats or more have been built up and
it has dried through, you can peel the latex from the mould. You'll notice
that the latex has dried much darker than it was when the pigment was first
mixed in. Some pieces of the plaster mould may come away and leave white
specs on the finished rubber piece - these can be washed of with water and
you'll find after two or three times using the mould this no longer happens:

The latex version of the item will of course turn out the
same as your original clay sculpt. You can use the plaster mould time and
time again to make more items the same in your choice of pigmented latex.
In this case we have also chosen to paint some features on
the latex item. The best thing to stick to latex, is more latex, so we have
mixed some green pigment with a small amount of latex and painted that onto
the item. You could also try other water based pigments mixed with latex
such as acrylic paints. As the pigmented latex will always dry darker, you
may have to use several coats on dark backgrounds:

|