|
...Lifecast a limb using Alginate
This How-to will tell you how to make a lifecast of your
hand or other limb using Alginate.
Alginate is a non-toxic, fast setting, water based
moulding compound. It's main ingredients are seaweed and therefore is it
safe to apply directly to your skin - it's the same stuff the dentist uses
to make a cast of your teeth so that dentures and crowns can be made to fit.
The general process for lifecasting is to mix up Alginate
with water, spread it on the area you want to cast, wait a few mins for it
to set, pull it off and make a plaster cast from the impression. However, as
Alginate comes as a powder and turns to liquid when mixed with water, you'll
need to contain the whole thing inside something rigid so it doesn't run
away, and it'll also need to be held firmly once it's set as it still
remains flexible like a soft rubber. There are various methods to this, the
two main ones are explained below:
Method one - quick and simple, but could be better
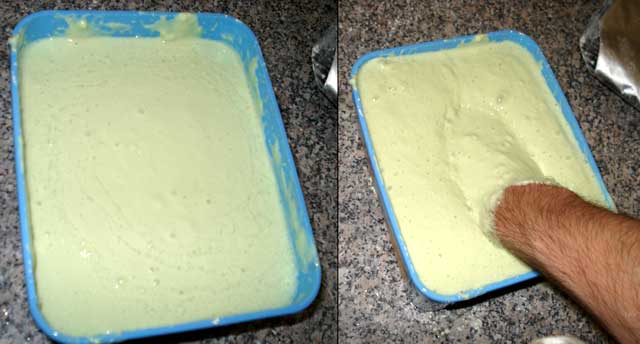
For this attempt we will simple mix up alginate inside an ice
cream carton to contain it and stick a hand in to make the mould. For this
we have used one large 550g pack of Alginate mixed with water to just over
1:1 by volume. This almost filled the ice cream carton:

After making sure the whole lot is properly mixed with
water I stuck my hand in. You may wish to put a small amount of petroleum
jelly such as Vaseline on any hair, although I didn't in this case and there
weren't really any issues getting the Alginate off:
This Alginate is 'slow setting' which is around four
minutes. It's important to try to get the Alginate to stick to every surface
of your hand so wiggle your fingers around and generally try not to leave
any gaps or air bubbles - this can be quite tricky using this this method as
you can't really see what's going on.
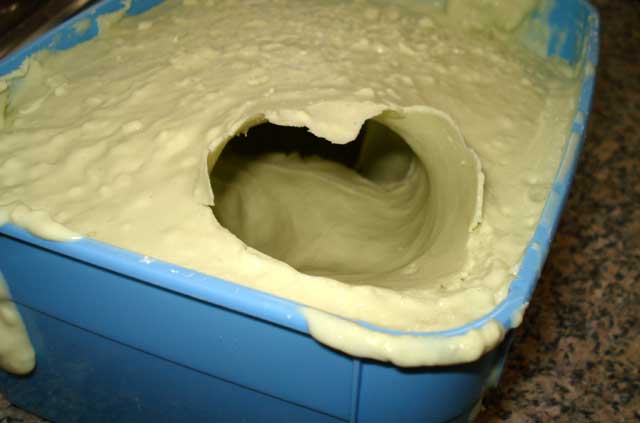
After the Alginate has set, gently try to loosen each
finger and move your hand around until you feel it release. Be careful not
to tear the alginate as it's quite fragile. You should eventually be able to
pull your hand out leaving a hole where it was:
You must use the Alginate mould as quickly as possible
after making it. Alginate will quickly dry out, shrink and crack, so you
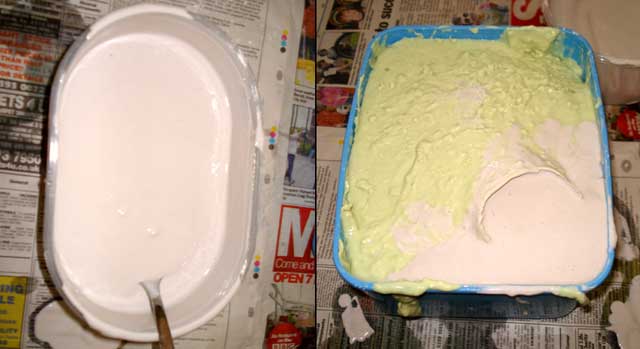
only get one opportunity to do it right. Firstly fill the Alginate mould
with water and pour it out into another container - this will rinse the
mould out, but also you'll then know how much plaster you'll need to fill
it. We have mixed up some Herculite 2 hard casting plaster and poured it
into the mould:
After the plaster has had an hour or so to set, it's time
to break it out of the mould. The Alginate will be fairly easy to pull away
in chunks - if you use any tools etc to cut it, make sure you don't damage
the plaster cast:
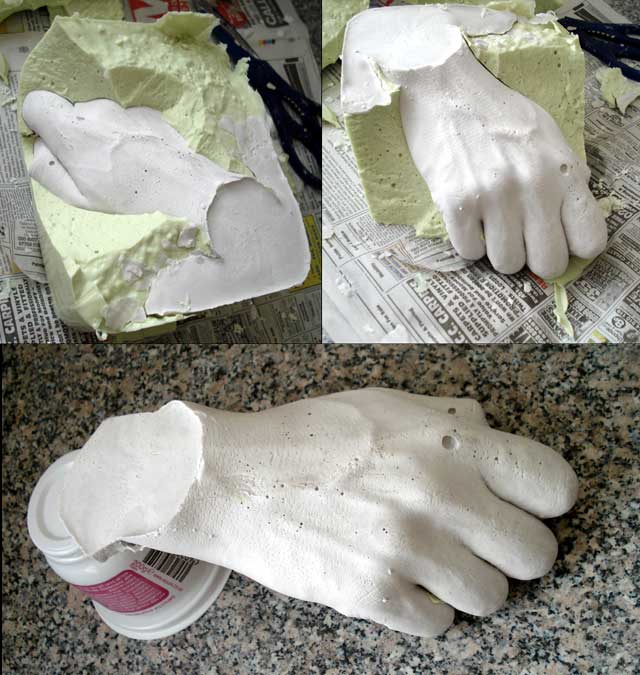
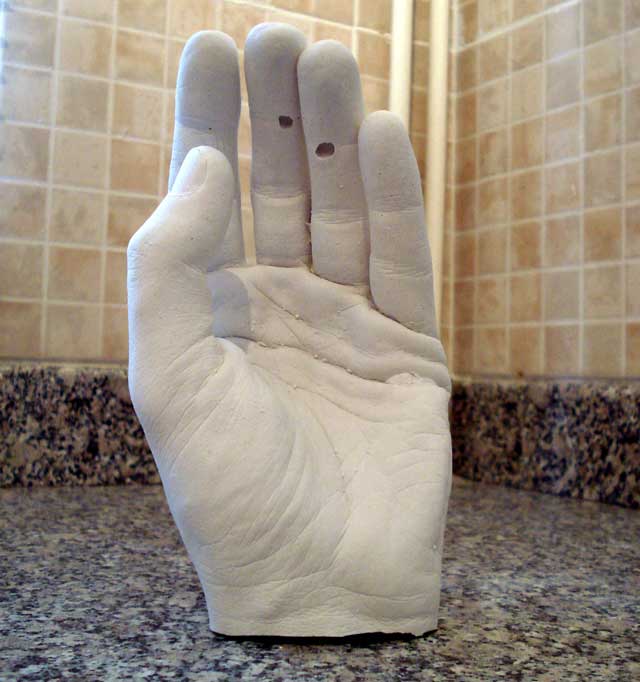
The piece has come out fairly well, although there are
quite a few large air bubbles on top - this is where bubbles have risen out
of the plaster and got trapped on the upper surface. If we turn the piece
over there is also an issue where my hand was touching the bottom of the box
- basically because it wasn't big enough. There are also a few lumps on the
bottom where there was air trapped between the Alginate and my hand:
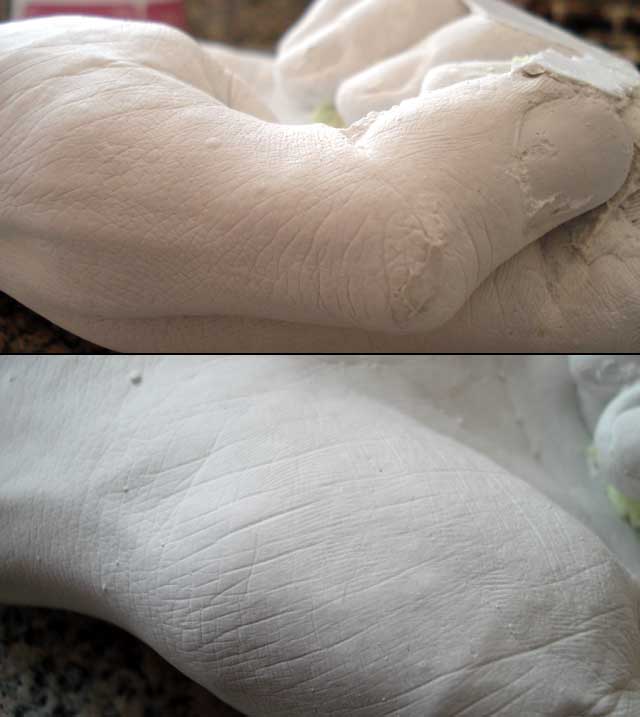
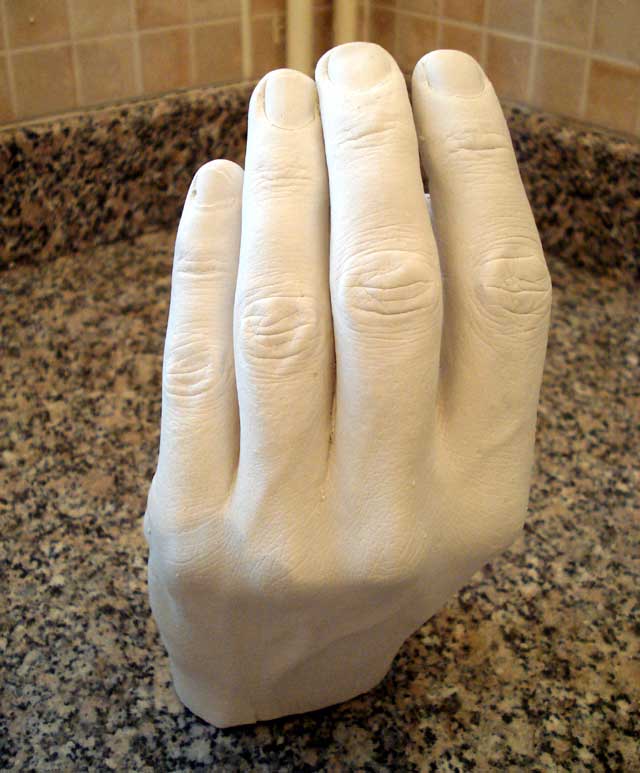
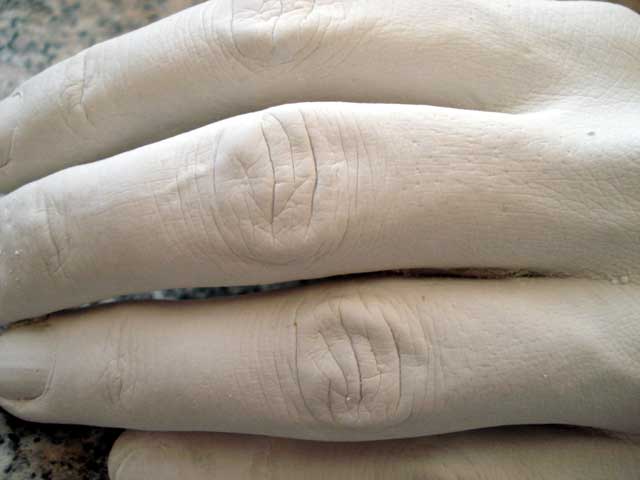
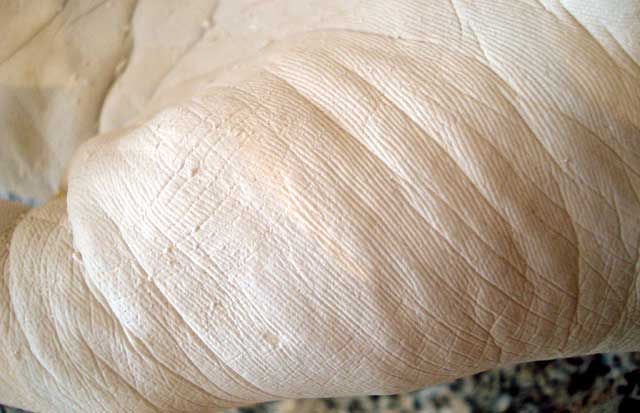
However, if we take a closer look at the cast, we can see
some very fine detail has been picked up, which is what we wanted to happen
all over:
We can improve on this method by spending an little extra
time, and a small amount on extra materials.
Method two - almost perfect
This time, we will spread the Alginate onto the person,
rather than putting the person into the Alginate. This will allow us to
eliminate the air bubbles/gaps an also get an even thickness all over rather
than having to find a box big enough - this way we can also make more
effective use of the Alginate. We will use Modroc plaster of Paris bandages
to hold the whole thing firmly once the Alginate has set so it keeps it's
shape when it is removed from the person. You can use this method to cast
other body parts as the Alginate can be spread onto any part of the body.
You may wish to put a small amount of petroleum jelly
such as Vaseline on any hair, although I didn't in this case and there
weren't really any issues getting the Alginate off:
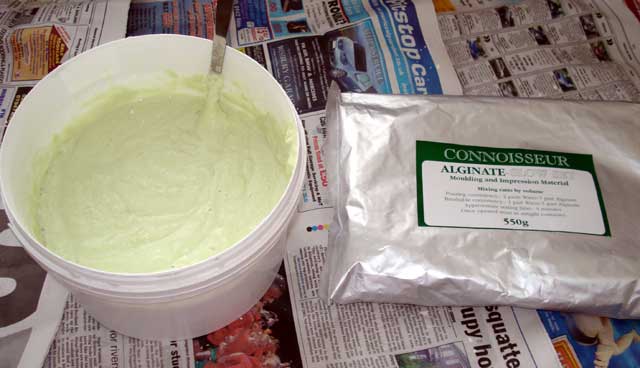
Firstly we mixed up just less than one 550g packet of
Alginate with water until it looked spreadable. This was probably more then
one part water to one part Alginate, but we didn't bother to measure it:
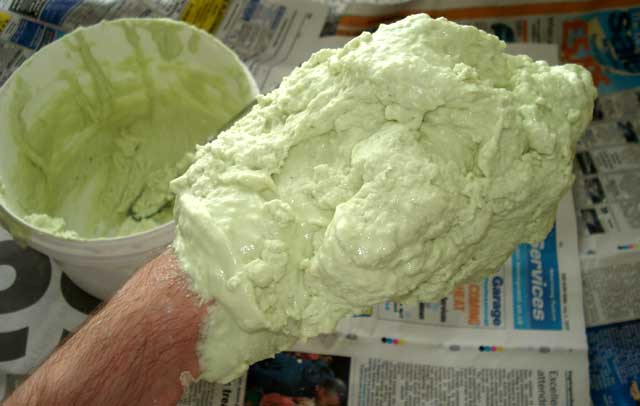
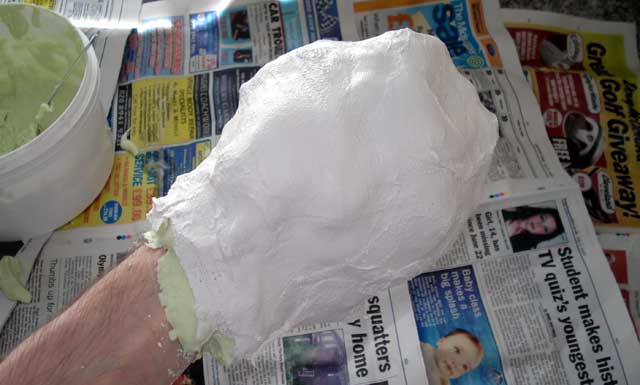
The mixed Alginate was then spread all over my hand. You
could attempt this on your own, although it's quite handy to have a helper.
We didn't use all of the Alginate, so once you get the hang of it you'll
probably be able to use about half of one 550g packet for this process:
The next step is to make a support case from modroc
plaster bandages. We used around a few hundred grams of modroc for this.
You'll note that it doesn't really set very well as the Alginate is full of
water which stops it drying quickly. However, within 10-15 mins it should
set rigid enough to support the Alginate:
Now it's time to remove your hand - try to loosen each
finger and move your hand around until you feel it release. Be careful not
to tear the alginate as it's quite fragile. You should eventually be able to
pull your hand out leaving a hole where it was:
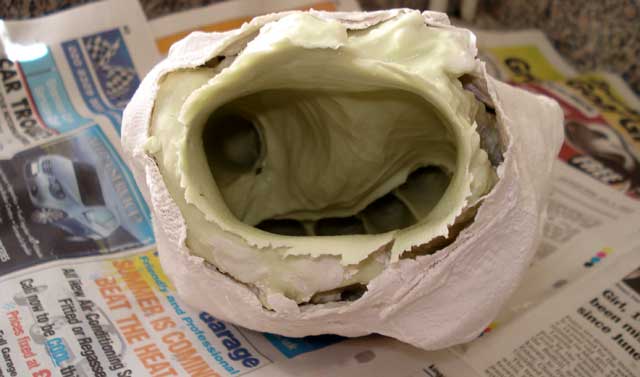
As before, we will make a plaster cast from the Alginate
mould. You must use the Alginate mould as quickly as possible
after making it. Alginate will quickly dry out, shrink and crack, so you
only get one opportunity to do it right. Firstly fill the Alginate mould
with water and pour it out into another container - this will rinse the
mould out, but also you'll then know how much plaster you'll need to fill
it.
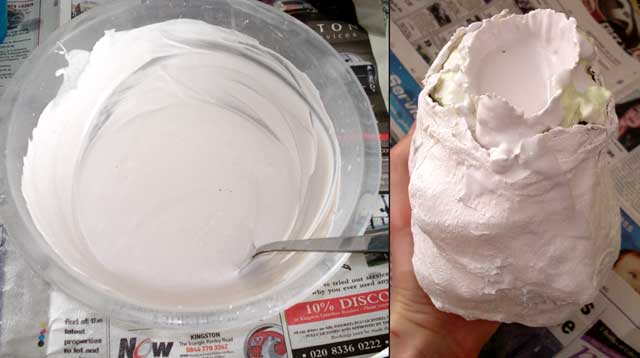
We have mixed up some Herculite 2 hard casting plaster
and poured it into the mould. However, this time we had opportunity to tilt
the mould around which will coat the surfaces of the mould and eliminate
most of the bubbles. As the mould is much easier to handle, it can also be
left perfectly upright for the plaster to set, so any bubbles can rise to
the surface instead of getting trapped on overhangs:
After the plaster has had an hour or so to set, it's time
to break it out of the mould. The Alginate will be fairly easy to pull away
in chunks - if you use any tools etc to cut it, make sure you don't damage
the plaster cast:
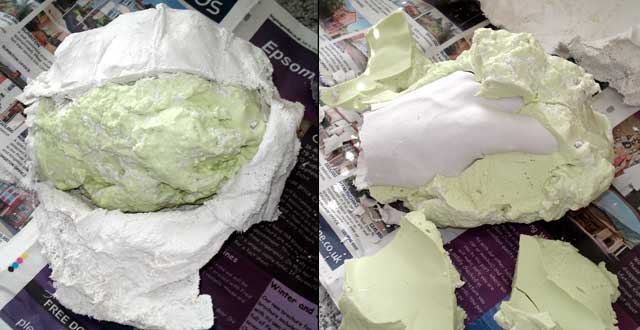
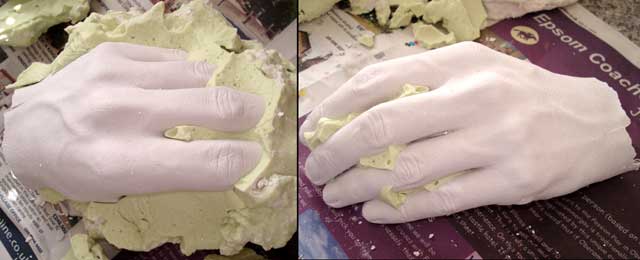
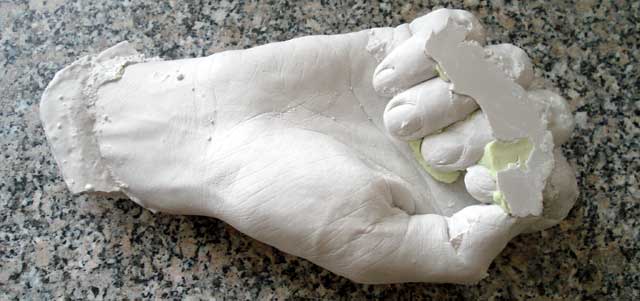
The overall item is far better than the first attempt,
although there appear to be two small bubbles in the underside of the
fingers, the piece is highly detailed as before:
Important! - Remember:
Alginate is non-toxic -
You can spread it
on skin, although if you wish to use it to mould other items test a small
sample first to check it doesn't stick.
Alginate is water based
- It absorbs a lot of water so leave extra time for plaster casts to dry
before removing them.
Try other methods
- If you ware working with very young children or someone who won't stay
still for long enough, try putting the alginate in a tray and making shallow
impressions in it with hands etc. This way you can cast a 3D relief without
struggling to remove body parts completely encased in Alginate.
Watch out for hair
- it is possible to
cast your face or complete head in Alginate, but watch out for eyebrows and
eyelashes. Remember to cover hair and apply some petroleum jelly to any hair
that may get stuck in the mould.
Make a reusable
mould - Once you have the plaster cast, you can make more items the same
by using it to produce a latex mould that can be used time and time again.
Check out the main How-To index to read about latex
mould making.
|
