|
...Mould it and cast it in something solid
This How-to will tell you how to make a flexible mould for a
piece with a rigid support jacket and then cast it in something solid so it
turns out the same as the original sculpt.
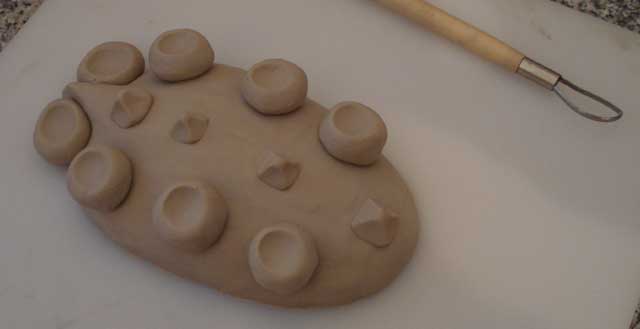
Firstly you will need to sculpt your piece, the picture
below shows the custom item sculpted in an non-air drying, sulphur-free oil
based clay. This clay is 'chemical free' so it will not
affect the moulding substance and cause any issues.
Important: Oil Based Clay is reusable - you can use it
time and time again to make different sculpts once you've finished with the
moulding stage of the process.
The piece is placed onto a plastic board - an old chopping
board in this case:
We will use latex to make the mould, although you could
investigate other moulding rubbers such as Silicone RTV or Urethane moulding
compounds. Latex is the cheapest but you generally get what you pay for, so
the downsides are that it will shrink as it dries and can also only be built
up in thin coats which can take a while. However, latex is good for low cost
one off pieces and suitable for the purpose of this How-to.
Although latex is not solvent based, it is always best to
use it in a well ventilated area as it has a bit of a smell to it - rather
like ammonia.
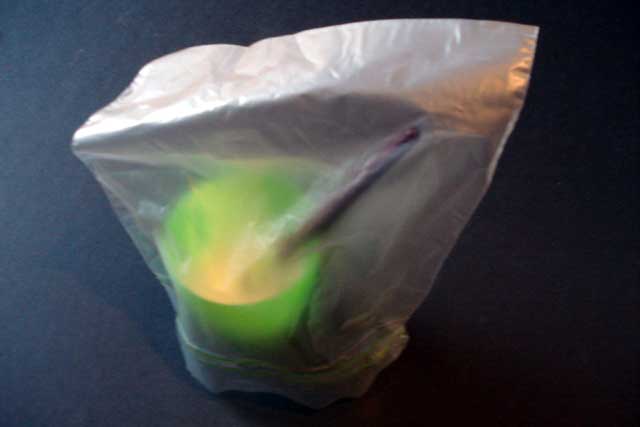
Latex is air drying, so any brush you use to apply it will
also get dried latex in which is very hard to get out. To avoid ruining too
many brushes you should keep the brush submerged in latex and covered with a
plastic bag in between coats. This will allow the brush to at least last as
long as it takes to make the whole mould:
Although latex is brushed on in this example, you can also
dip the item in latex to built up thin coats, however this is only really
practical for items that can easily be suspended from the base such as chess
pieces etc.
You'll need to apply thin coats of latex to start with, and
try to brush out any bubbles, allow around 30 mins to one hour drying
time in between coats. You can tell when the latex is dry enough to apply
the next coat as it will become almost clear to start with, and as you build
up layers it will become brown:
Here's the first coat just on and still wet:
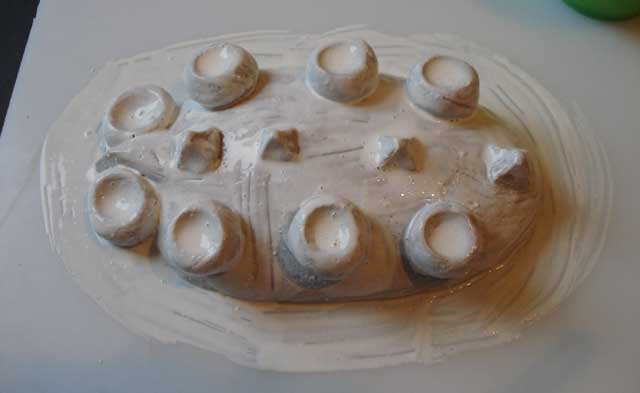
Here's the piece after about ten coats have been applied, you can see the
latex has gone a very brown colour:

You could continue to apply coats to build up the mould thickness further,
but this becomes time consuming. Depending on the piece, you may prefer to
add layers of cloth to the mould - this will help build up the thickness
quicker and will also stop the mould shrinking so much as it dries. However,
it will also prevent the latex mould from being as stretchy, so you must
consider that any details may get trapped inside the mould as you'll never
be able to get the piece out.
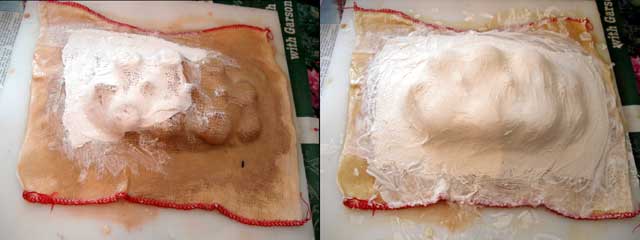
In this case the cloth has been applied like a 'tent' over the whole piece
so that the 'blob' parts on top are not trapped. This cloth is just cheap
dish cloth from a high street household store, but it is very absorbent so
it will soak up the latex enabling a thicker mould to be built up quicker:

Once everything has dried, we will be left with a thick latex and cloth
mould. However, this will still be quite flexible, but at this stage we also
have the opportunity to add a rigid support jacket. The support jacket will
fit perfectly over the latex mould to hold it straight while we cast from
it. For this example we will make the support jacket out of modroc plaster
of bandages:
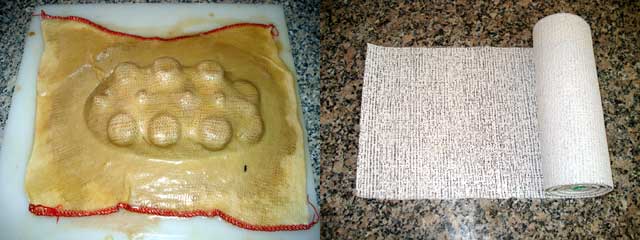
Modroc plaster of Paris bandages are built up over the main part of the
mould. Cut the bandage roll into pieces, make each one wet in a bowl of
water, try to get as much excess water out as possible, and then layer them
up all over the piece. Around 4-5 layers were used in this example:
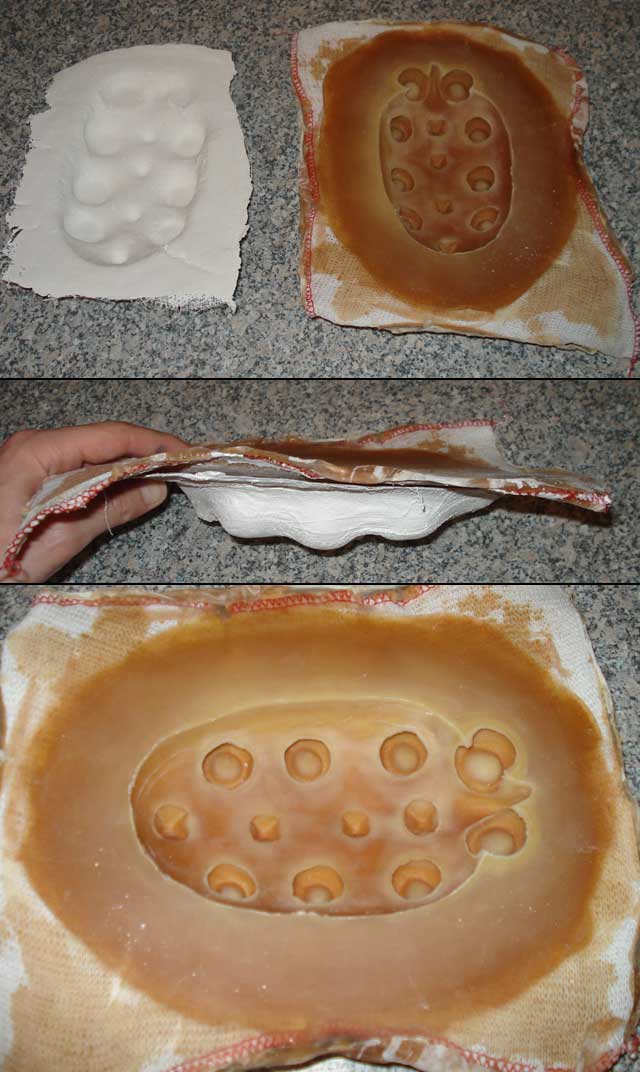
Once the plaster bandages have dried out thoroughly, they can be removed
from the latex part, and the latex can be peeled from the clay sculpt. This
should leave you with a rubber mould that fits back inside the rigid plaster
bandage support jacket:
At this point we have finished making the mould of the piece and we are now
ready to cast from it. Of course you could just pour plaster or some other
casting resin into the mould and make a solid piece. However, in this
example we are going to make a rigid and hollow shell from Jesmonite AC100
and glass fibre fabric. This will be much lighter than a solid object and
also be very strong due to the reinforcement.
Jesmonite AC100 is supplied as a liquid and a powder which are mixed
together at a ratio of 1 part liquid to 2.5 parts powder. A Jesmonite
thixotrope additive is also available to make the mixed resin into a gel
which won't be as runny - this is useful for the first coat inside the mould
when we are making hollow items.
Jesmonite is non-toxic and non-flammable as it is water based. Although it
has no dangerous fumes like solvent based resins it should still be used in
a ventilated area as it has some odour. In this example the work has been
carried out indoors with a nearby window open.
Firstly we have have mixed up a small pot of Jesmonite as directed. This was
measured out with a set of scales and mixed by hand. For large amounts of
Jesmonite over 1Kg it is recommended to mix it with a blade in a power
drill. This is largely so it can be mixed properly before it starts to
solidify which takes around 8-15 mins. However, in this case we used a
teaspoon handle.
The Jesmonite thixotrope was added until the resin was no longer runny. This
should be added at 2-6g per 1Kg of mixed resin, so this is a very small
amount. In order to get this right, the handle of the teaspoon was dipped in
the thixotrope about 2cm and then used to mix it into the resin - that's
literally all you need.

A nice thick coat of thickened Jesmonite AC100 is applied to the mould,
making sure that it went into all the details. You may wish to mix and apply
several thickened coats until you can no longer see the rubber mould through
the resin, allowing each a few minutes to set in between:

The next coat we will apply will be a thin glass fibre fabric called surface
tissue. This weighs approximately 30 grams per square metre, so it is very
lightweight as easily conforms to the surface. This coat will bond to the
initial gel coat and make a rigid shell which we can apply a thicker fabric
to without cracking the gel coat when pressure is applied. The surface
tissue is damped down all over with more mixed Jesmonite resin, this time
with no thixotrope added:

The next step is to apply some proper reinforcement. Once the surface tissue
coat is dry to the touch the next layer of thicker fabric can be applied. In
this example we are using Jesmonite Stitched Quadaxial mat. This an open
weave multi-axial glass fibre mat which is easy to wet through with resin.
Although the manufacturer of Jesmonite recommends only using Quadaxial mat,
other glass fibre fabrics can be used. One layer of Quadaxial mat is applied
and wet through with mixed Jesmonite AC100 resin, shortly followed by a
second layer:

Allow at least an hour for the whole thing to set. Jesmonite AC100 has an
active catalyst so it will set solid even in thick layers, it is not reliant
on air drying. However, it will be softer for the first 24-48 hours before
full strength is achieved, so if you need to sand, drill or trim the piece,
this is the time to do it.
Once it has all set, you can remove the plaster bandage support case and
peel off the latex mould to reveal the piece which should be exactly the
same as the original sculpt. Of course the mould can be used time and time
again to produce multiple pieces the same:

The excess can be trimmed from the piece and it can be generally finished as
you wish. Jesmonite AC100 can painted with a wide range of paints from
cellulose car paints and lacquer to water based acrylics or even house hold
gloss and emulsion paints.
Check out the Jesmonite AC100 Strength
Testing page with video of destruction testing. |
