|
...Mould it and make it out of rubber with a multi
part mould
This How-to will tell you how to mould a more complicated
piece and make the finished item in rubber. This technique is used for
complex shapes which would otherwise be impossible to remove from a one
piece mould.
Make sure you read the
How-to on making a simple rubber piece before you attempt this.
As with the single sided example the original item has been
sculpted from Oil Based Clay which is non-air drying. This is important so it
remains pliable and we can easily remove the piece from the mould. In this
example, two blank eyeball forms have been fitted which will be replaced
with painted eyes in the finished piece. These eyeball forms will help
retain the right shaped eyeball socket in the piece throughout the moulding
and casting process.
Important: Oil Based Clay is reusable - you can use it
time and time again to make different sculpts once you've finished with the
moulding stage of the process.

Unlike the single sided example, this
piece has a front and a back that we will need to mould. To do this we will
need to make a two part mould in order that we can get all the clay out of
the plaster.
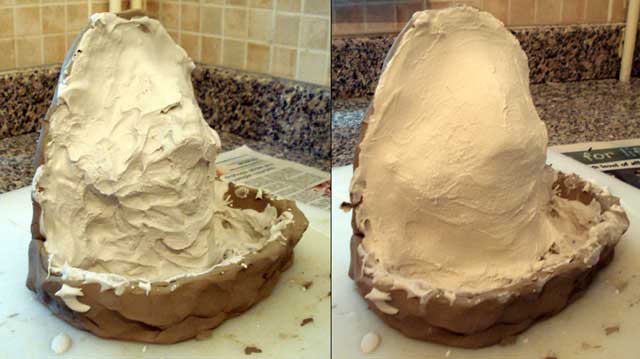
The sculpt is divided into two with water based clay. This clay will not
stick to the oil based clay, and it will also separate from the plaster
provided it is not left to dry out. The idea is to get the water based clay
to meet the oil based clay as close to a right-angle as you can - this will
enable easier removal of the water based clay. Also the join from water
based clay to oil based clay should be as tight and clean as possible.
At this stage, you may wish to seal the water based clay with a petroleum
jelly (like Vaseline). This help you remove it from the plaster after the
first mould half is done, but is generally optional - if you remove the clay
at the right time it won't stick. You may wish to experiment with some clay
of both types and some plaster before trying it for real on your sculpt -
you only get one chance to make the mould as the process of removing it from
the clay will destroy the original.
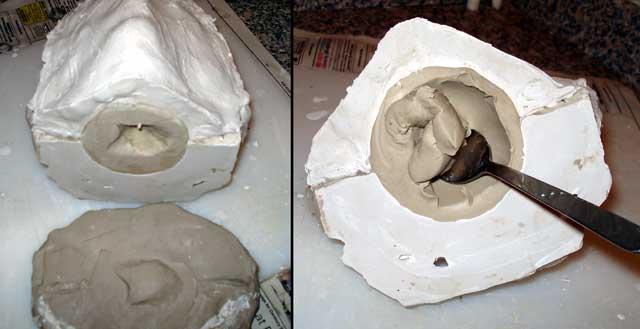
In the example below some dips in the water based clay wall have also been
made which will make it easier to fit the two halves of the mould back
together later:

As before the front of the sculpt is covered with multiple coats of plaster,
and in this case it has also been reinforced with modroc plaster of Paris
bandages:
Once the plaster has set you can remove the water based clay. Important:
make sure you remove the water based clay while it is still wet, do not
allow it to dry out. Peel it away slowly and try to get it all off in one
piece. Make sure all the Water based clay is gone - you may have to
carefully remove any that is left, being sure not to mark the original oil
based clay sculpt.
Once that's done you should have half the original clay sculpt stuck in
plaster and the other half still exposed. The next step is very important
- you MUST cover the plaster face with something to prevent more
plaster from bonding to it. In this example a petroleum jelly (like vaseline)
was used: A water based clay base has also been added to the piece and it
has been laid flat to make the application of the plaster to the back of the
piece easier:
As with the front, several layers of plaster have been built up, followed by
a layer of modroc plaster of Paris bandages for reinforcement:
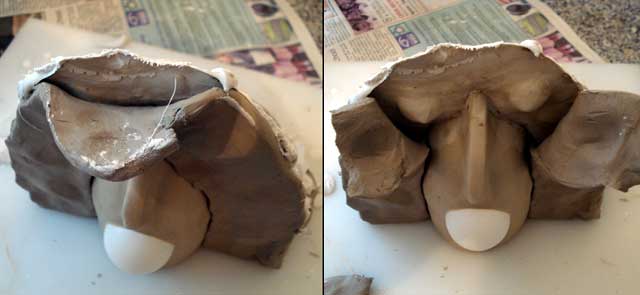
Once the plaster has set, the clay base can be removed. Dig out the middle
of the clay enough to be able to grip both sides of the mould:
Gently pull the two halves apart - provided you applied the petroleum jelly
or something similar correctly they should easily separate. Note that the
dips we made in the water based clay wall are now present on both sides of
the mould and fit perfectly into each other making mould reassembly much
easier:

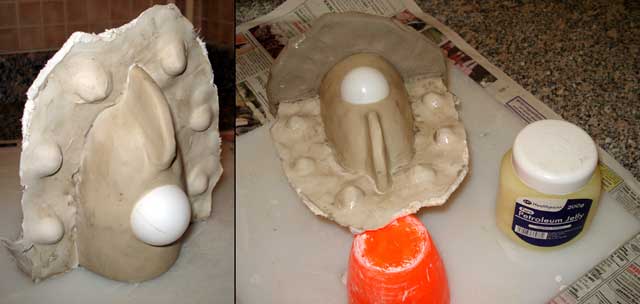
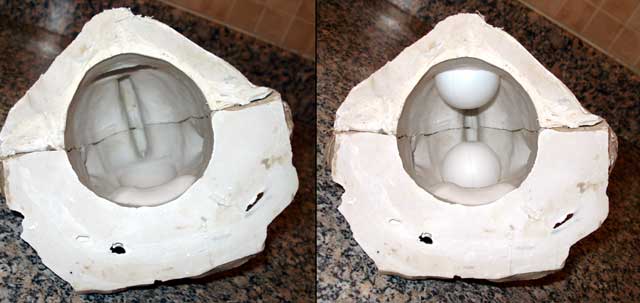
Clean any excess clay and petroleum jelly from the mould and test
reassembly. In this example the eyeball forms have been glued back into
place as replacement eyes will be fitted later so we need to leave space for
them in the final piece. You could just as easily leave them out and make
the eyeballs as part of the main latex piece.
You can see the seam between the two mould halves in the example, making
this as fine as possible comes with practise - it's mainly down to the
quality of your water based clay wall. However, in this example you'll be
able to see what the effect of a less clean seam is - effectively it just
means the finished piece will have to be trimmed later on:
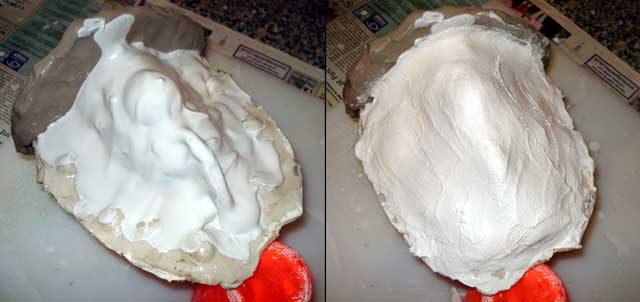
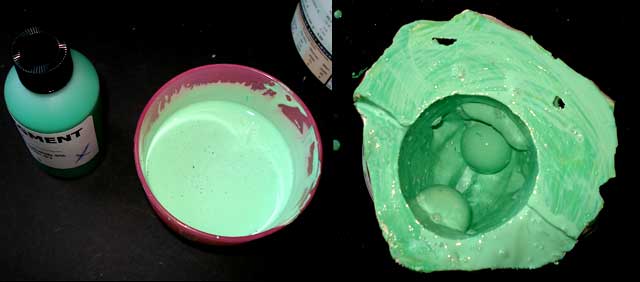
Next it's time to apply the latex to the mould. This time green pigment has
been used - as you may have guessed the item is intended to be some sort of
alien. Pigment is added to latex at around 5% - as with the
single sided example it will dry much
darker.
Layers of latex are built up in the mould by partially filling it and
tilting it around, and also by brushing latex over the edges and onto any
parts that get missed:
Once five or more layers are complete and dry, it is time to remove the
piece from the mould. As you can see the piece looks fairly tatty - the seam
between the two plaster mould halves has had latex seep into it as well as
partially around the front eyeball. We have left the back eyeball out for
now so the socket can be seen:
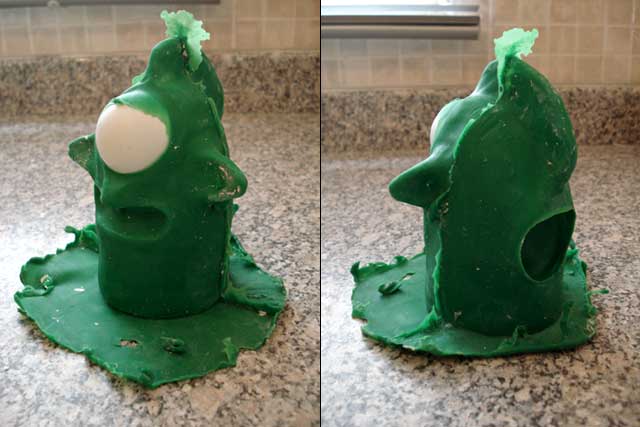
After a trim with a sharp pair of scissors, and a wash with water to get the
bits of plaster out, things looks much better. The mould seem line is still
partially visible, but this is the often the case even with commercial
products - with practise at the water based clay dividing wall stage this
can be reduced even further:

|
