|
...Mould it with thickened Silicone RTV
This How-to will tell you how to mould an item
in Silicone RTV using the thickener additive. This process is
sometimes easier than boxing up the item for Silicone moulding of
larger pieces, and also makes a more efficient use of the Silicone
moulding compound.
 |
The cure of
Silicone RTV rubbers can be inhibited by other chemicals such
as latex, and sulphur found in some types of clay. Please
check compatibility before moulding.
This silicone is NOT safe for use directly on skin or for use
with food products such as making ice cube moulds.
|
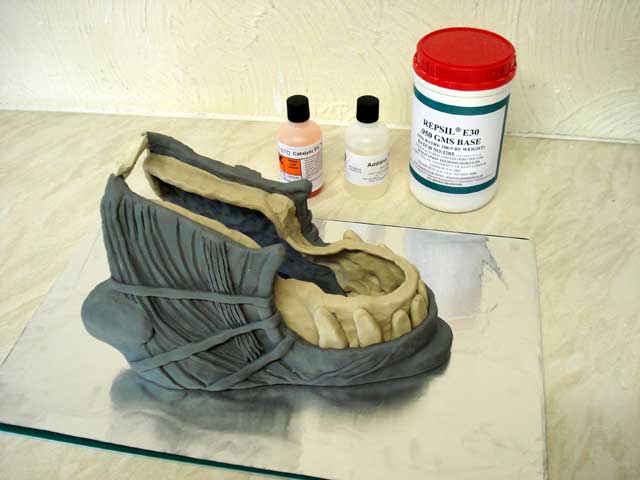
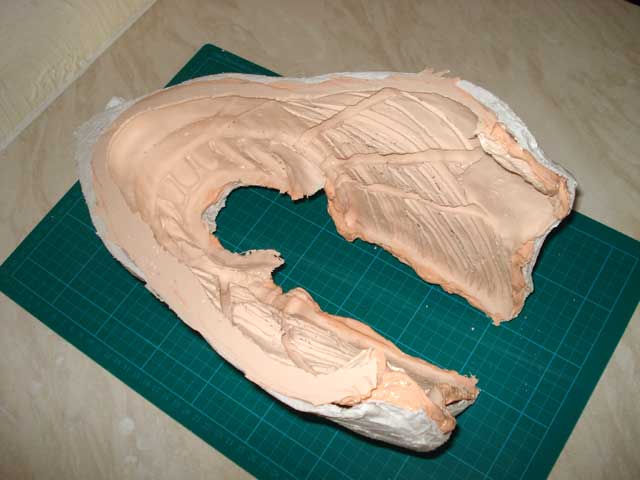
For this example we are going to make a
Silicone mould from a clay sculpt which is the bottom jaw for a
monster mask/prop. This is item is sculpted in Oil Based Clay which is
sulphur free, so we know we will have no issues with the Silicone
curing:

We have added some extra clay which will stop
the Silicone from running down the inside of the sculpt, and this
gives us a clear edge to the piece. Since I've had latex on my
cutting board before, we covered it with tin foil to make sure we
have a clean surface to work on.
|
|
Read the manufactures instructions and
data sheet before using this product.
Wear gloves and goggles, and use the product in a well
ventilated area, or wear a suitable respirator/face mask.
The catalyst for Silicone is harmful, so
the entire kit should be kept out of the reach of children and
animals. |
We are now going to mix up our silicone. We
mixed roughly half of a 1Kg kit at a time using a gram scale to
get the right amount of catalyst:
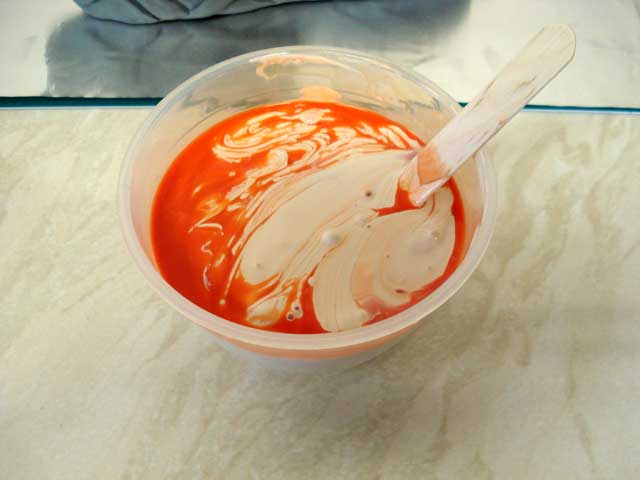
The catalyst is orange in colour, whereas the
base Silicone is white. This enables you to see when it's properly
mixed - you should find the whole thing is a uniform salmon pink
colour once it's mixed. It's recommended to pour the mixed
Silicone into another container so make sure it's mixed properly -
otherwise you can never get the base Silicone that's stuck to the
side of the container mixed with catalyst. In this case we just
mixed it in one container, but if you do this be careful if you
scrape the last bit out of the pot because it probably won't be
mixed with catalyst.
Here's the mixed Silicone, you can see that
it's still quite runny - most of it would just run off if we
applied that to the piece right now:

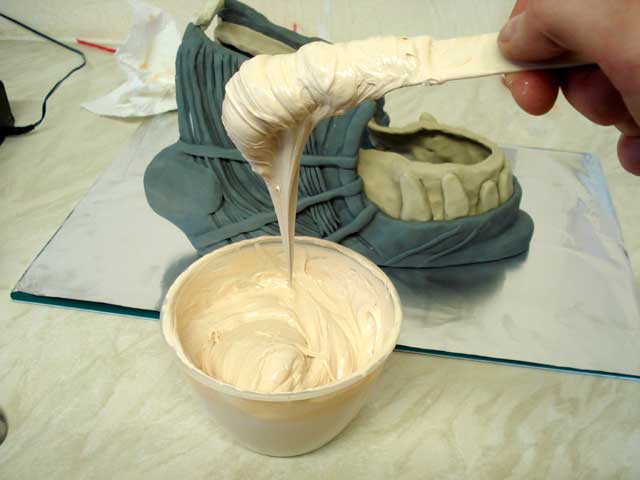
Next we mix in the thickener. This should be
added at 3-5% in small amounts until the Silicone is the desired
thickness. The main difference you'll see here is that the
Silicone is much less runny and mainly stays put:
Now it's time to spread the Silicone onto the item:
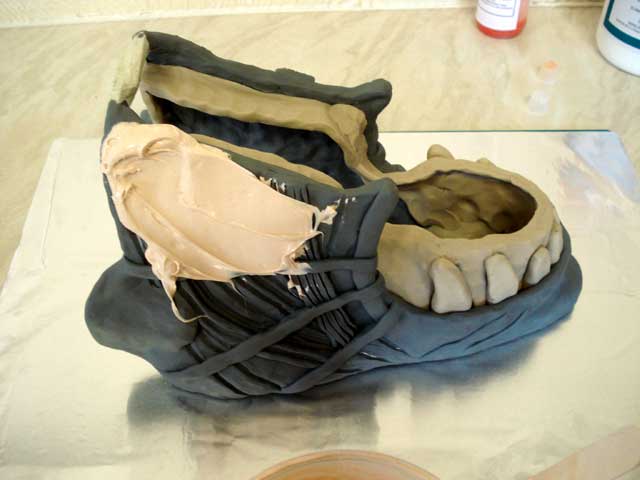
Make sure you spread this into every detail and
smooth away any trapped air. For this piece we covered the entire
sculpt with one fairly thin layer of Silicone:
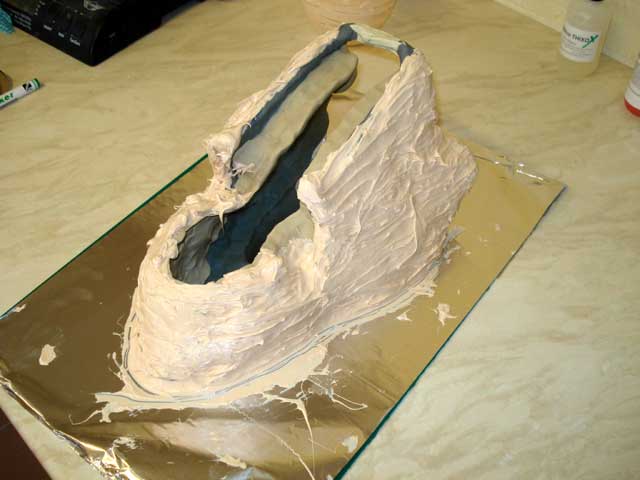
You can get away with one coat of Silicone for
some pieces, but in this case we mixed the rest of the kit up and
applied a second coat. We waited around an hour before doing this
so the first coat had started to cure, but Silicone sticks to
Silicone whether it's cured or not, so this could be done at a
later stage:
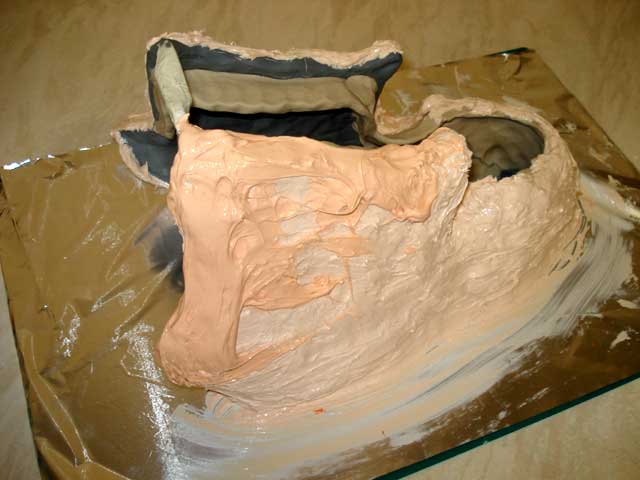
This silicone has a working time of 90-120 mins
and cures in 22-24 hours, according to the manufacturer. We found
that it had lost it's tackiness and set through after around four
hours, although it won't achieve it's full strength until 20+
hours.
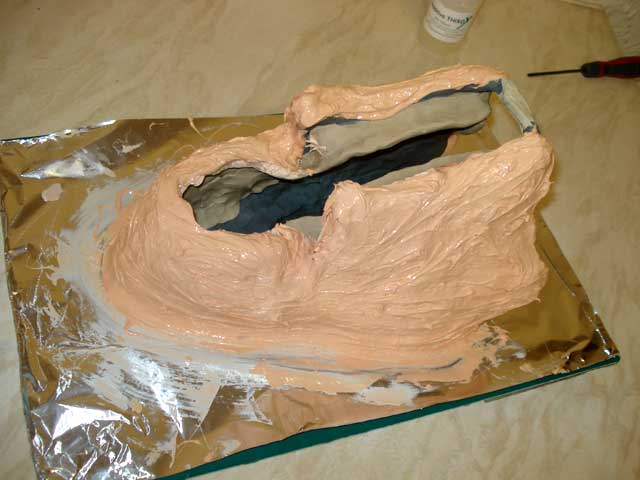
24 hours later...
Now the Silicone has cured it's time to make
the mother mould. This is a rigid support jacket which will
support the Silicone mould once it is removed from the piece. We
did this one in Modroc because it was quite small, although you
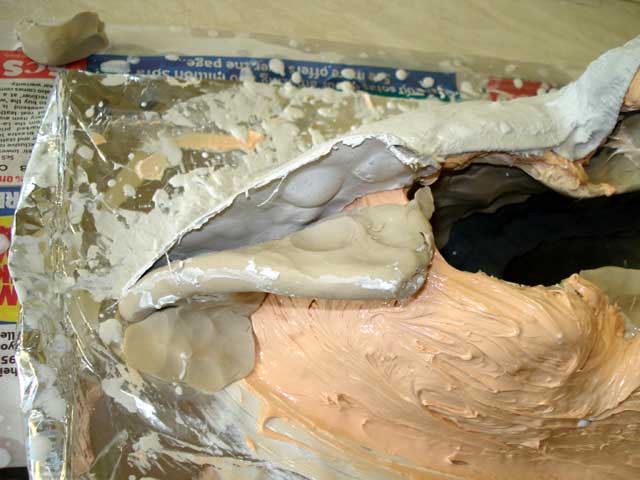
could use fibreglass, Jesmonite, or just plaster. First we made a
dividing wall out Oil Based Clay - it has two 'keys' in it so it
always fits back together correctly, and we start to apply the
Modroc:
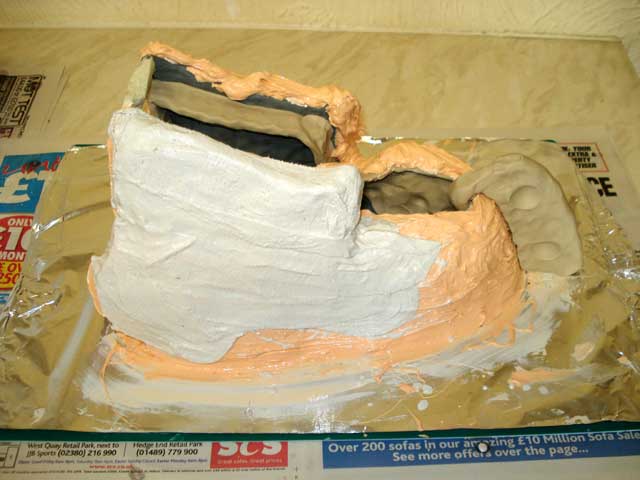
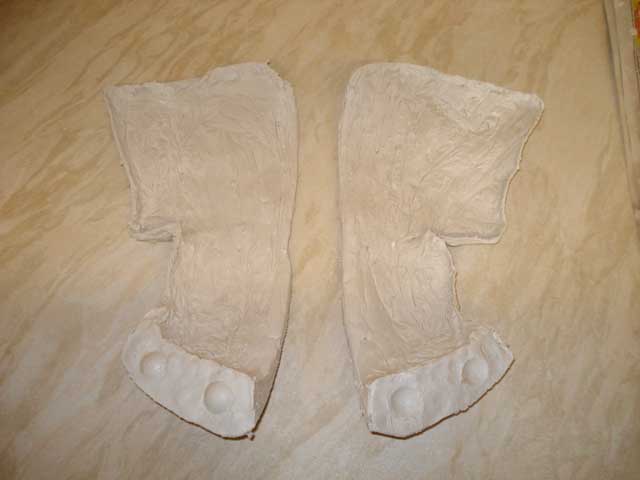
We covered the first side with around 6-7
layers of Modroc until it is covered and looks like it will be
strong enough:
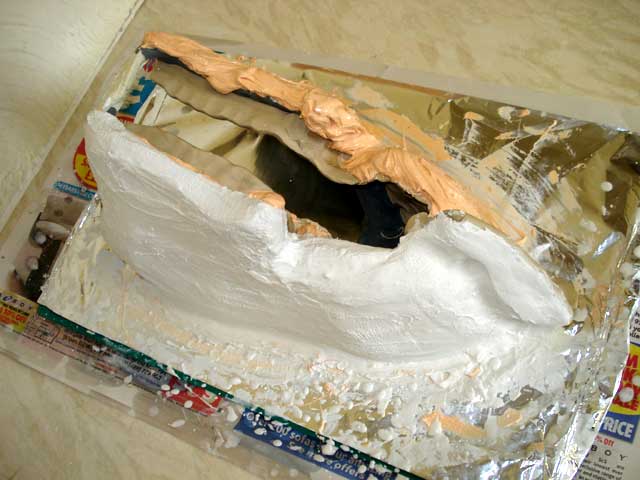
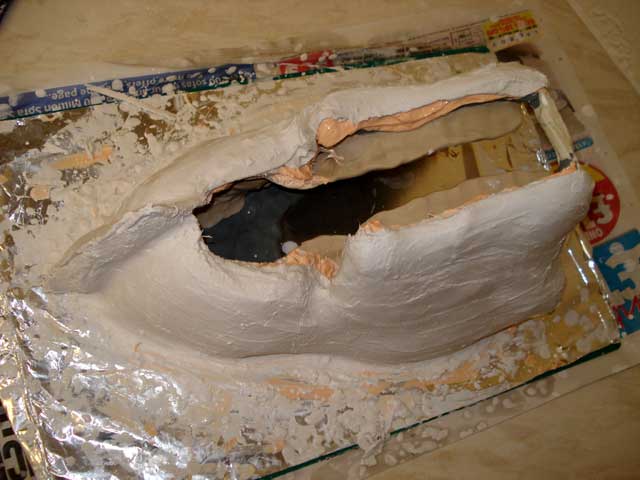
The Oil Based Clay dividing wall peels away in one piece:
We applied petroleum jelly to the exposed edge
of the plaster wall - this is crucial to stop the second half from
sticking fast to it:
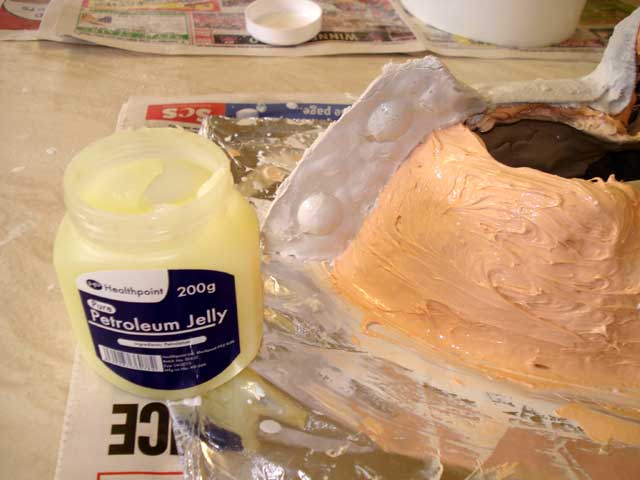
We then made the second side of the mother mould with some more
Modroc:
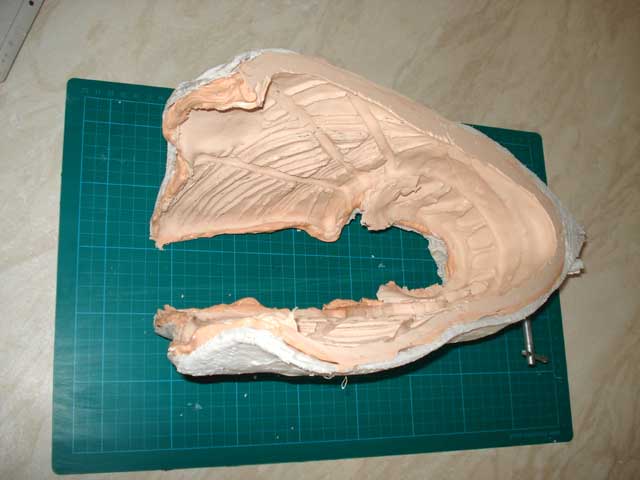
Silicone gives incredibly good release for most
moulding and casting products, so it was easy to separate the
Modroc mould halves after the Modroc had set:
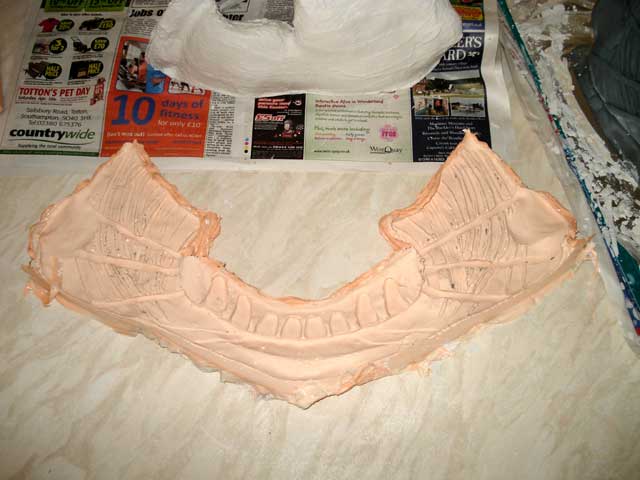
The Silicone mould peeled right off the sculpt:
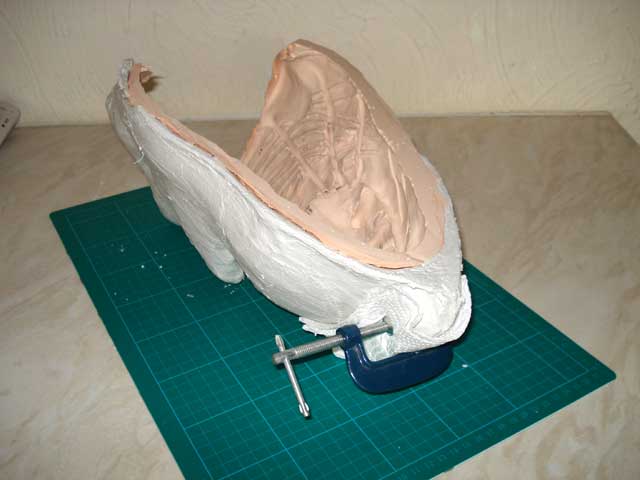
We used a small clamp to hold the Modroc mother
mould back together, and then inserted the Silicone mould back
inside. All ready for casting / laminating in your choice of
material - we'll be doing this one in Jesmonite and glass fibre
matting:
Important! - Remember:
Oil Based Clay is reusable -
You can use it time and time again to make different sculpts once
you've finished with the moulding stage of the process.
Silicone RTV will set through in one solid section and sets
with a catalyst, so there's no need to build up thin air drying
coats like you would with latex.
Silicone RTV gives much better reproduction than latex -
it's doesn't stretch or shrink as it dries as because there's no
water content to dry out.
Silicone RTV has a better mould life than latex - you'll
get far more casts from the mould before it wears out.

|