|
...Make your own full head monster mask or prop
This How-to will tell you how to make your own custom
full overhead
Halloween rubber monster mask or prop from scratch. Make sure you check out
the two simple latex making articles from the How-To
article index before attempting this.
We are going to make a monster head from scratch and
fabricate the finished item mainly in latex. You could use this process to
make a wearable mask, but in this case we will be making a display piece
complete with artificial eyes, teeth and hair.
As with the other latex making tutorials, we are going to
make a clay sculpt from Oil Based Clay which is a non-air drying
clay. This time we'll sculpt the piece over a mannequin head so the item is
not made of solid clay. Mannequin heads are generally smaller than adult
human heads and also not 100% anatomically correct. However, in this case we
are going to be inserting eyeball 'place holders' into the clay, and making
a non-100% human form anyway, so this works out quite well.
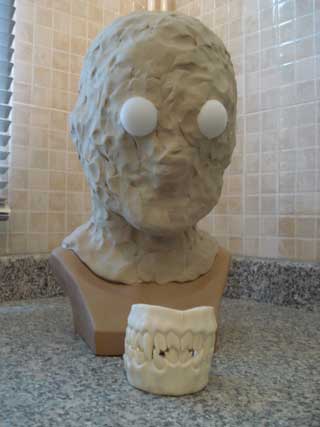
The finished piece will have artificial teeth, which can
be bought off the shelf, so we'll keep these
handy for size reference throughout the sculpt. We'll be using ping pong
balls for the eyes, which are larger than human eyes, but roughly the right
size for some 40mm artificial ones.
The first step is to cover the head with cling film or
foil which makes getting the clay off right at the end much easier - so you
don't ruin the mannequin head which can be used for display afterwards:
Important: Oil Based Clay is reusable - you can use it
time and time again to make different sculpts once you've finished with the
moulding stage of the process.
 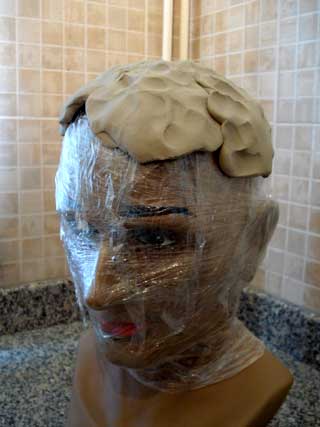
Oil Based Clay is then built up all over the head until it's
covered. This gives us as base to stick more clay to and sculpt into.
Important: If you are intending to make a wearable mask, make sure that
the whole thing is big enough to fit over your head - you may need to add
more clay than you think.
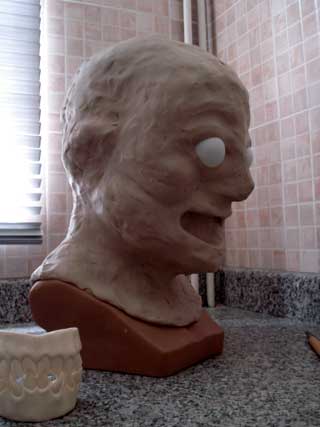
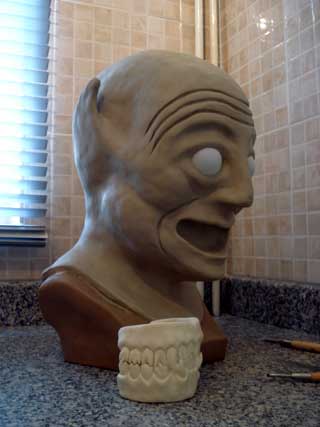
The head is now covered with clay. The eyeball forms have
been inserted roughly in front of the mannequins eyes:
 
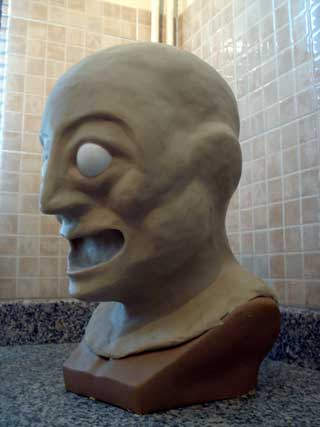
Try
working lumps of clay in your hands until they are soft enough and then
stick them on to make the basic form - don't worry about too much detail
yet:
 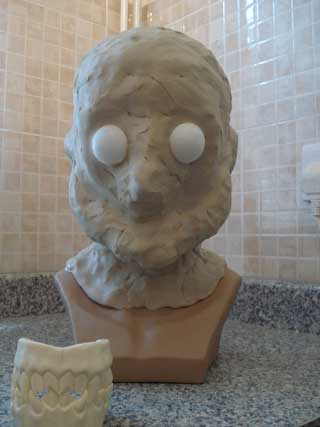
If your monster is vaguely human - in this case it will
be a zombie/demon style thing,then you can check in the mirror to see where
various features are on a human face - check bones, jaw lines etc. If you
monster is inspired by another animal then it's worth getting some reference
pictures to look at and compare the basic shapes. Most of the basic shape is
now complete, but there is still a lot of work to do:
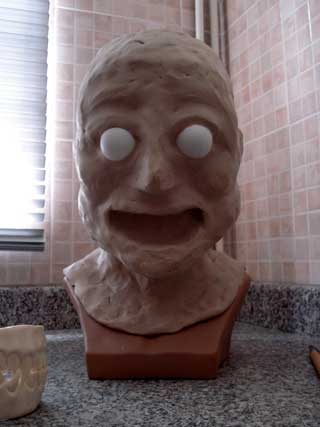 
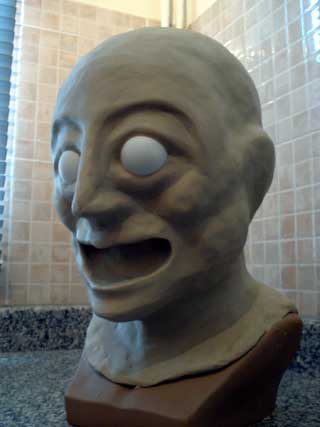
All of the basic shapes are complete and the sculpt has been roughly
smoothed all over - but since it' a zombie/demon it doesn't need to have
perfect skin. The next stage will be to add some detail:
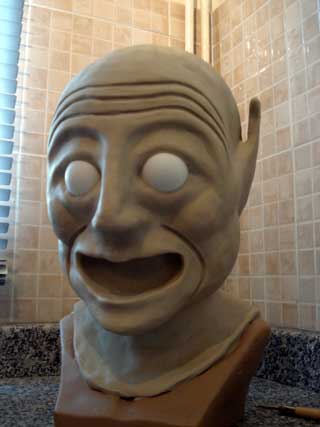
We decided to keep this sculpt quite bold, so not too much fine detail,
although you can of course add any other features you wish. The sculpt has
become more of a demon than a zombie, but it seems to suit the way the basic
form took shape:
Once you are happy with the sculpt it's time to make the mould - this will
be in two parts so that we can get the mannequin head and clay out o the
middle once we've finished. As with the
double sided latex making tutorial, we will use water based clay to
divide the sculpt.
The sculpt will need to be divided pretty much exactly in the centre,
although you can deviate from this slightly if it suits the sculpt better.
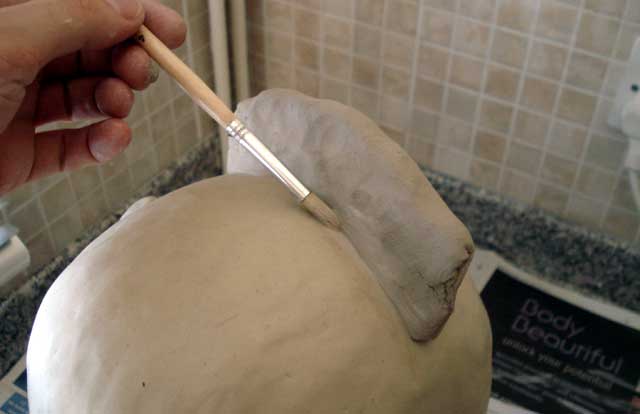
Make sure that the seam between the water based clay and oil based clay is
as tight as possible - you may wish to use a small brush and some water to
smooth it out:
In this case we will apply plaster to the back of the head first, so this
part is important to get right - don't worry about the seam between the oil
and water based clay at the front. We've also built up a piece of water
based clay along the bottom edge to make the plastering stage easier as
we'll have to do the first half with the whole thing upright.
You'll notice there are a couple of round impressions in the water based
clay - this is to provide a key for the two halves of the mould to lock
together once we're done:

At this stage, you may wish to seal the water based clay with a petroleum
jelly (like Vaseline). This help you remove it from the plaster after the
first mould half is done, but is generally optional - if you remove the clay
at the right time it won't stick. You may wish to experiment with some clay
of both types and some plaster before trying it for real on your sculpt -
you only get one chance to make the mould as the process of removing it from
the clay will destroy the original.
Now it's time to add the plaster. Apply mixed plaster all over the first
half of your sculpt. You can apply this by hand, being careful not to damage
any fine details, but making sure the plaster goes into any holes and
wrinkles. We are using Crystacal R plaster for this which is one of the
hardest plasters:
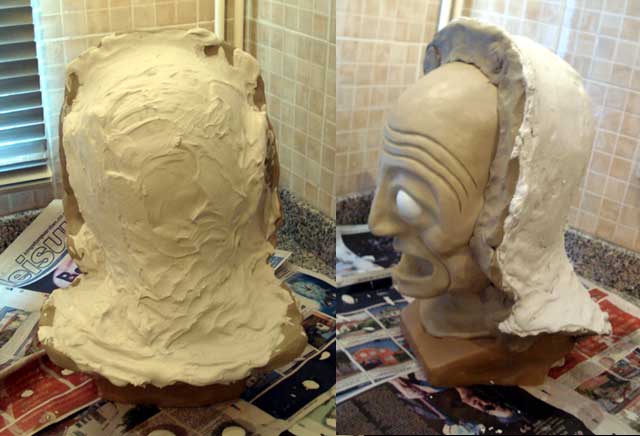
Build up several layers so all of the sculpt and water based clay divider
are properly covered. We have also reinforced the last few layers with a
cotton scrim - you can also use modroc for this to make things easier:
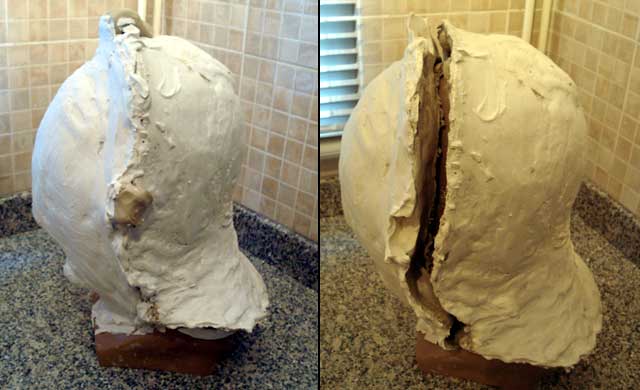
When the plaster starts to set it will become warm - this is the time to
remove the oil based clay, which you should find pulls away in one piece.
This can be a bit hit and miss so you may have to clean off some residue
with a small brush and some water making sure you don't mark the oil based
clay sculpt. This should leave you with half of the sculpt covered in
plaster, and the other half sticking out:

Next, lay the piece down on it's back so it's easier to to the front without
the plaster running away. Important - you must seal the exposed plaster
edge with petroleum jelly to stop the other half of the mould sticking to
it.
You may also wish to put some lumps of oil based clay around the edge, but
not touching the sculpt - these will create 'finger holes' in the mould to
assist with getting the two halves apart later:.

Once you have made sure the exposed plaster edge is properly covered with
petroleum jelly, you can repeat the plastering process on the front:

Once a nice thick plaster coating has been built up you can remove the oil
based clay finger holes which should leave sufficient space to pull the
mould apart. Make sure the plaster has set before trying to separate the two
mould halves - around an hour should be sufficient:
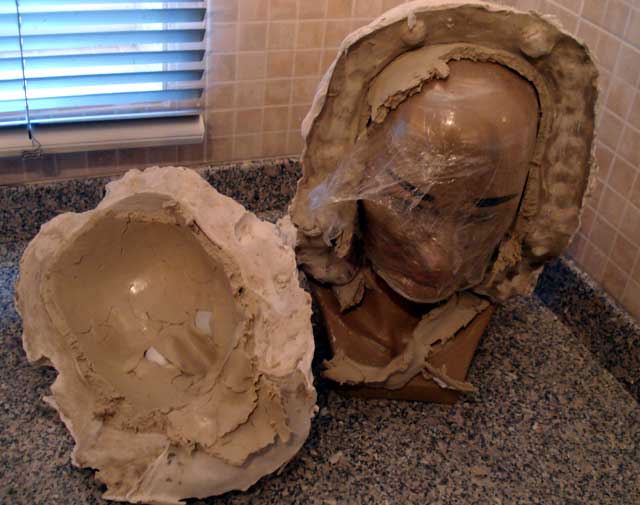
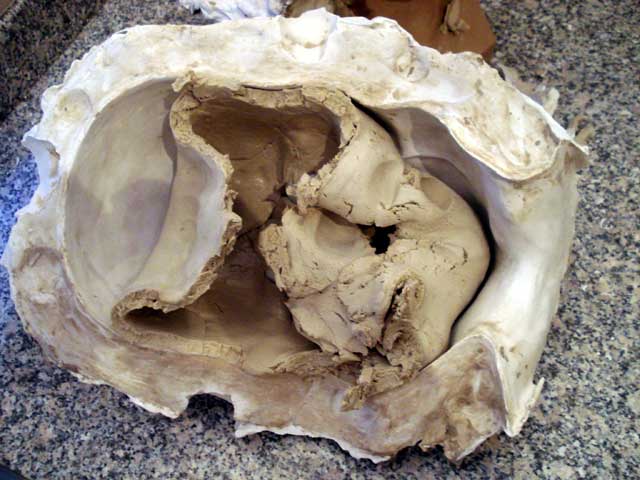
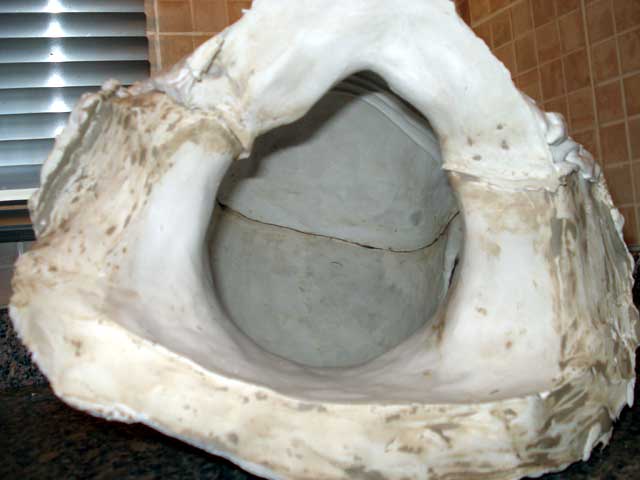
Once the two halves have been carefully separated, you can remove the clay
and the mannequin head from them. The oil based clay should pull out in once
piece - any that is left can be cleaned with a damp cloth once the plaster
has had a few more hours to set.
Important: Oil Based Clay is reusable - you can use it
time and time again to make different sculpts once you've finished with the
moulding stage of the process.
This should leave you with two halves of the mould that fit neatly back
together:
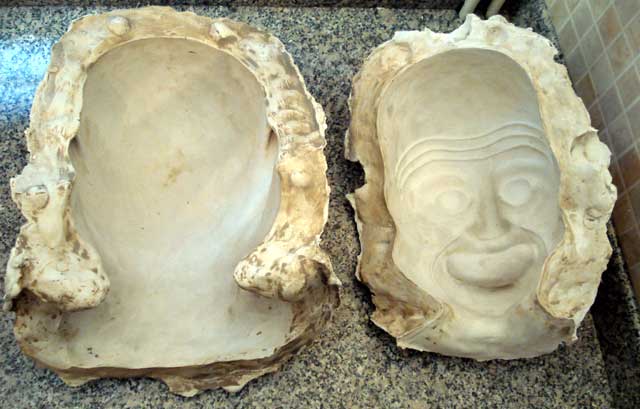
Here you can see the seam line, but it should be quite tight fitting - this
example is not perfect, but there are a few ways to sort this out if you
find any major issues:
Once the mould has dried for 24 hours or so you should inspect it for any
imperfections. Now is the time to sort out any issues such as air bubbles
etc that you may find - these can be filled with a small amount of mixed
plaster and smoothed over with water. In this case we have also chosen to do
some work along the seam line to get the best result.
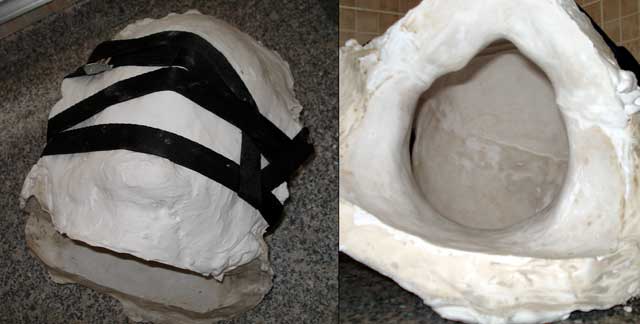
The two halves of the mould have been strapped together with a webbing strap
from a car accessory shop, you could use bungees, string, tape etc as long as
it's held together firmly. In this case we have filled the seam line with a
little more plaster, and smoothed it over with water - this will save us
some hassle trimming the 'shim' off the finished piece later, and as the
item is going to be flexible we will still be able to get it out of the neck
hole.
However, if you are considering making any solid pieces inside the mould
such as an under-skull for animatronics work, then you must leave the mould
in two halves so that you can get the pieces out again with having to break
it open.
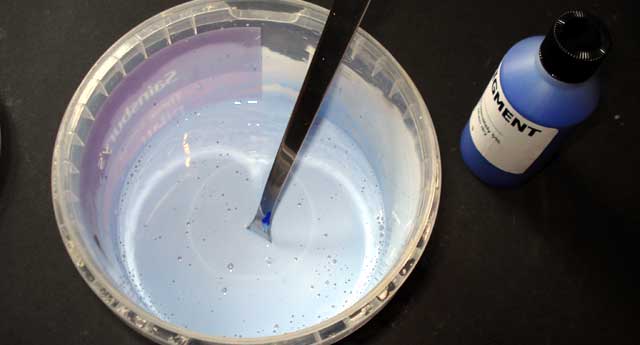
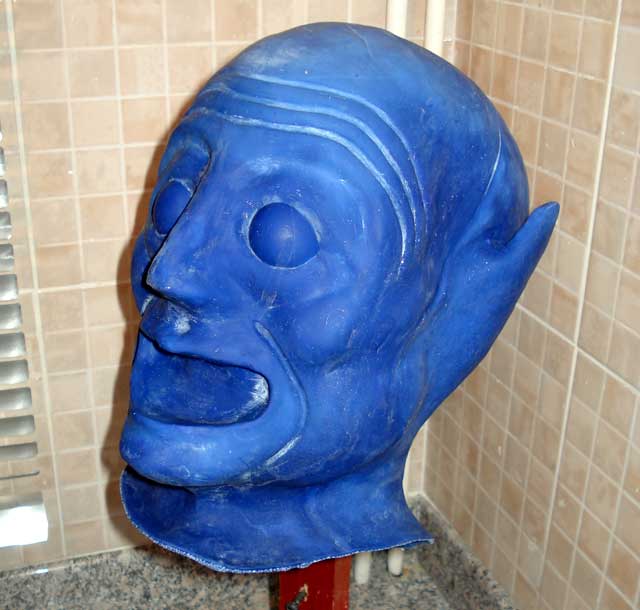
Once the plaster has had time to dry through - around 24-48 hours, it is
time to do the latex part of the process. This time we have used blue
pigment, which should be added at around 5% of total latex. You will need at
least one litre or more of latex for an item of this size, but in this case we have
added it in smaller stages:
Latex is poured into the mould and the mould is rotated around so it coats
the entire inside of the mould. You will notice a smell like ammonia when
working with large quantities of latex, so it's always best to do this
process in a well ventilated area. You can also use a brush to apply latex
to the mould all the way out and around the neck hole - the piece can be
trimmed later:

Once the mould is coated the excess can be poured out. You'll notice that
the first few coats appear to dry quickly as the plaster will absorb the
water from the latex. Once the first coat is dry repeat the process until
around ten coats of latex have been built up. If you wish any parts of the
mould to be thicker than others you can leave latex pooled in these areas
for up to an hour - you will find that the plaster sucks out the moisture
and these parts will become thicker once the excess is poured away.
If you want to make a latex mask like those that are available from fancy
dress shops etc, then around ten coats of latex should be sufficient.
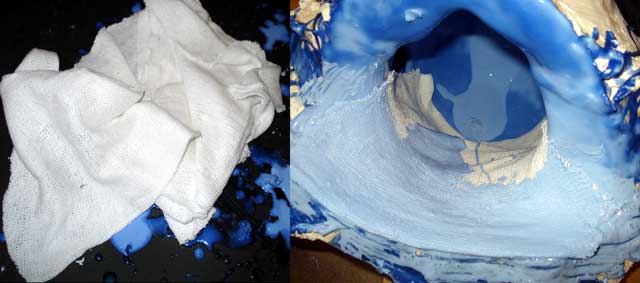
However, in this case we are making as display piece so we want the finished
item to be a lot more rigid. Therefore, we have applied layers of cheap dish
cloths to the inside of the mould and soaked them through with more latex to
add stiffness to the piece. This is the same principle demonstrated in the
How-To articles that deal with latex mould making and
casting.
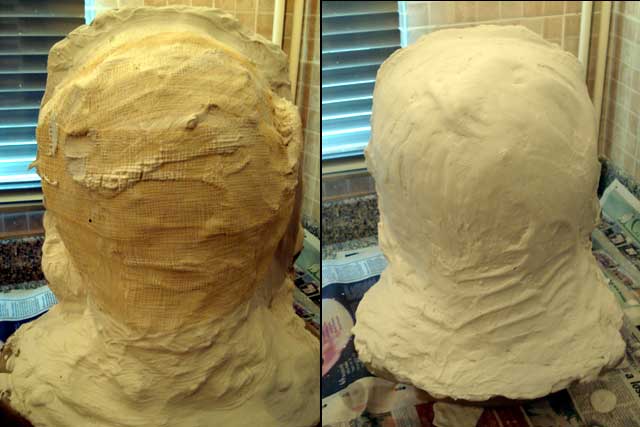
Cloth was applied to the entire inside of the mould with exception of the
eyes and mouth/face so these areas are easier to cut out later on when we
insert the eyes and teeth:
Once the latex has dried properly you'll notice it has gone a much darker
colour, depending on how thick you make the piece this may take up to 24-48
hours. Then the latex can be peeled away from the mould an removed all
together. The initial pull from the mould is pictured below. There are still
some areas that need to dry through properly which will be quicker now it
has been removed from the mould, there are also a few bits of plaster
residue stuck to the latex which will need to be washed off:
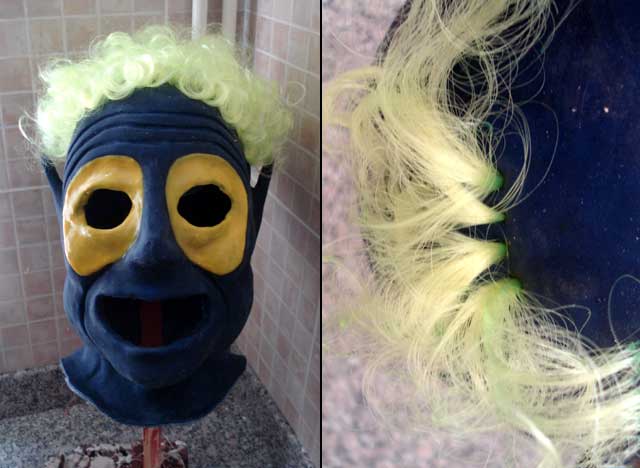
After the latex is dried through properly you can think about painting your
mask and adding hair. We have used latex pigment mixed with more latex to
paint this one, although it took several layers to paint yellow over blue.
We have also added hair by making holes in the head and pushing it through
with a small screwdriver:
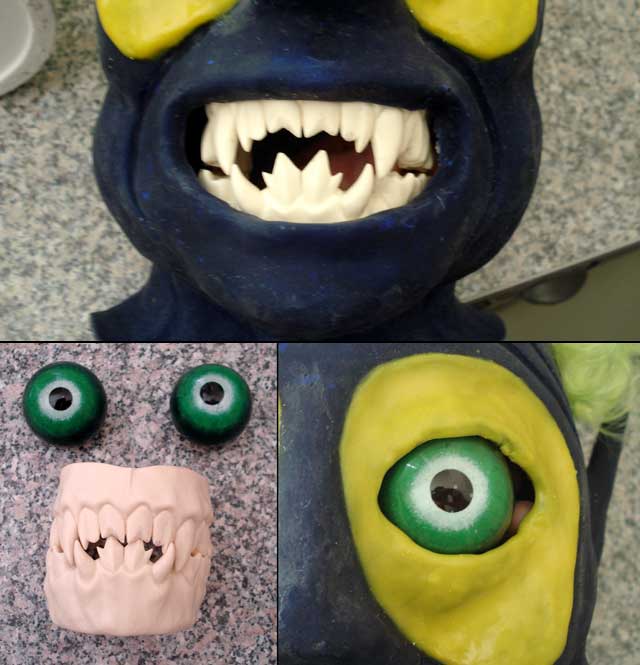
The eyes and mouth have been cut out, so at this stage you could use it as a
mask, although you'd probably need to cut a slit up the back so you can get
into it and cover that with hair. In this case, we are going to continue to
add some off the shelf eyes as well as the teeth we originally started with
once they have been painted up. We'll need to make extra rubber pieces to
hold these in place - the eye sockets and inside the mouth including the
toungue:
Important! - Remember:
Oil Based Clay is reusable - You can use it time and time again to make
different sculpts once you've finished with the moulding stage of the
process.
The Plaster Mould is reusable - Once you've made it you can
use it time and time again to make more masks the same, just buy some more
latex and pigments as required.
You can make anything - If you can make the shape in clay you can
probably make it in latex provided you can easily remove the clay from the
plaster mould.
Accessorise it - Add teeth, hair or fabric to finish it off - or you
could make extra latex parts to add to the mask like a long tongue.
Latex sticks to Latex - If you can mix it with latex it will probably
stick to the mask, or use latex to glue extra pieces on.
Experiment - If you're unsure how something will turn out then try a
small sample of the materials first.
|
